Wednesday, March 30, 2011

Card: Birthday - Sun

e11_sunbday

Inspiration: I have a friend that uses these little wooden suns as her geocaching signature item.  Whenever I find one in a geocache, they make me smiley and cheery.  I thought the shape would make a bright happy birthday card!

How I Make Them: Again for this card, I already had a sun template.  Though I have used a hand-made template on occasion to get a slightly different shape to the rays.  I trace the sun template with the rays out of 2 different colors (usually an orange and red, the example in the image above uses neon-colored papers).  I cut a circle or oval (probably more of an oval) out of a yellow paper.  I usually glue the red-ish colored sun down first.  Then the orange-ish one with the rays slightly offset.  Finally I glue the yellow circle on top.  I draw a smiley face on the yellow using markers or gel pens.  On the outside I write, "Let the sunshine in!".  On the inside I write, "May you have a bright, sun shiny birthday!"

Alternatives:
  • I've thought about cutting out the circle from the two sun shapes and then placing the yellow on first to make it look like the face is more inside the sun.
  • You could use a third and maybe even a fourth ray color (though it might start getting too thick and heavy).

Monday, March 28, 2011

Card: Birthday - Party Hat

e10_hatbday

Inspiration: Since I'd already done a cupcake and balloons, I figured the next thing I needed was a party hat!  Plus the shiny paper really makes this look neat!

How I Make Them: This one uses another scrapbooking template I've had.  (There's no number or manufacturer listed on them, all I can tell you is that I have about a dozen plastic pages that are glittery purple with multiple shapes on them and that each sheet seems to be themed).  I trace the party hat template on the back of the shiny paper and cut it out.  I glue the hat to the card, usually at a slight angle.  Then I cut little confetti shapes out of scrap paper pieces, trying to stick with brighter colors like neons.  I randomly glue the confetti shapes to the hat, sometimes overlapping pieces.  Finally, I write "Happy Birthday" on the front and "May your special day be lots of fun!" on the inside.

Alternatives:
  • If I didn't have the shiny paper, I'd just use a plain solid color for the main hat and complementary colors for the confetti pieces.
  • This idea can be used for party invitations.
  • I might use this sometime for an "Over the Hill" birthday with a black hat and a number cut out in white.  It might be cute.

Saturday, March 26, 2011

Card: Birthday - Basketball

e9_bballbday
I thought I'd include this one since we're in the midst of NCAA March Madness.

Inspiration: I've always had no problem coming up with card ideas for little girls, but little boys on the other hand.  Well I have a lot less experience in this area.  Luckily I had a sports-themed scrapbooking template that helped me come up with this idea and a couple of others.

How I Make Them:   First I trace the basketball template that I have onto orange paper (if I can find textured paper that's even better) with pencil.  I cut out the circle and then trace over the lines with a silver gel pen and fill the area in.  The basketball gets glued to the front of the card and I add "Hoop It Up" above the ball.  On the inside, I write "on your birthday" or some other basketball inspired message.

Alternatives:
  • Sports-themed cards are also great for Father's Day
  • If I could draw a hoop and a backboard, I would probably do that too.  Hmmm, I might have to try making a hoop out of embroidery floss somehow.
  • This card could also be used for a young basketball player after a game that you go to see in which you tell the player how much you enjoyed the game and how well they played.

Thursday, March 24, 2011

Card: Invitation - Door (General)

e8_doorinvite

Inspiration:  I found this wood grain paper at Hollo's PaperCraft and though it would be great to use for a door.  Then it was just a matter of figuring out what I might need the image of a door for.

How I Make Them:  Out of wood grain paper, I cut a rounded top door shape.  I glue that on the page.  Then I either draw a handle with a black marker or use a hole punch to punch a circle in black or silver paper.  Finally I write "Come in, come in..." on the front.  On the inside, I create spaces for each of the standard invitation items: "What...", "When...", "Where...", "RSVP".

Tuesday, March 22, 2011

Card: Baby - Bib

e7_babybib

Inspiration:  I had a friend who was about to give birth to her first child.  I had templates for several baby items in my scrapbooking stuff.  I decided to go with the bib since we already knew the gender.

How I Make Them:  I use the scrapbooking template sheet and make the bib shape out of either blue or pink paper.  I cut out the inner part of the main bib.  I use a white (or slightly off white) paper and make the bib part of the template (without the tie strings).  I glue the white to the colored paper (which is now mostly an outline).  I glue it to the card and then write "Baby Boy" or "Baby Girl" on the bib.  If I know the baby's name, I might also add it to the bib or make a more complex decoration on the bib using markers to personalize it.  For this card, I tend to just write a personal note inside the card rather than using a standard verse.

Alternatives:
  • I've used this design both for a baby shower gift card and to send as congratulations to friends that recently had a baby.
  • This design could be used as a baby shower invitation.  If the gender of the baby isn't know, a gender-neutral color like yellow could be used for the ties and bib edges.
  • It could also be used to announce a new baby - using the baby's name on the bib.

Sunday, March 20, 2011

Card: Birthday - Cupcake

e6_cupcakebday

Inspiration:  I've toyed with the idea of making a card that's a slice of cake, but when I've tried I've learned that I just don't know how to draw a slice of cake.  Instead, I decided to make a cupcake.

How I Make Them:  The first time, I created templates (see photo below) for the cupcake bottom, cupcake top, candle and flame.  For the bottom, I use either a shiny, silvery paper or a pastel in pink, green or blue.  For the top (frosting) I try to use a pink or white.  I make the candle in just about any color.  I make the flame in yellow and then add orange and red with marker.  I glue the bottom on the card first, then the top of the cupcake.  I tuck the candle under the top of the cupcake just a little.  Then I draw a small line from the top of the candle and glue on the flame.  Sometimes I add "jimmies" to the frosting using Sharpie or other markers.  Finally I add "Happy Birthday" to the front of the card and inside a verse like "May your birthday be sweet!"

Alternatives:
  • Instead of a straight candle, you could make the candle in the shape of a number (best for single-digit birthdays).
  • This card could also be used as a birthday party invitation or thank you card.
Additional Photos:

Friday, March 18, 2011

A Note about Glue

When I first started scrapbooking (in the early 1990's), a lot of the products available today did not exist (or if they did I didn't know about them).  I started using Elmer's Glue and eventually switched to Rubber Cement for my scrapbooks.  With the Elmer's Glue, no matter how little I used, paper mementos would get a little wrinkled.  The Rubber Cement stopped this.

So what does this have to with cards?  Well when I started making cards, I went back to glue.  I always use very small amounts and apply it with toothpicks or cut out small strips of paper (like 1 inch long by 1/4 inch thick).  Since most of the paper I'm using is a heavier cardstock that much of what I used when I was first scrapbooking, this seems to work the best.

As for all the other adhesive products out in the market now that scrapbooking has really become it's own industry, I'm not against using them.  I just find glue to be the most cost-effective option when making large number of cards.  When I use photos on my cards, I do tend to use either photo squares or photo tape.  And sometimes it is easier to use a double-sided tape.  I guess it just depends on what you prefer.

Wednesday, March 16, 2011

Card: Birthday - Balloons

It might be hard to believe but I used to send anywhere from at least 3 up to 15 birthday cards to various family and friends every month.  I've really cut back in recent years, preferring to send birthday cards to kids under the age of 13 (not that they appreciate it more, just that it gives me a chance to be cuter in my creativity).  This balloon themed birthday card is one of the first designs I ever came up with.

e4_balloonbday

Inspiration:  I don't think I had a specific inspiration for this idea.  At the time I needed to make a birthday card and this seemed one of the easier themes that would work for everyone.

How I Make Them:  I created a small template shape of the balloon.  I usually fit 5 balloons on a card but could probably do more if I wanted them to overlap.  The first time I made these cards, I glued the balloons to the card but left the very bottoms unglued.  Then I used embroidery floss for the string, gluing it down from under the bottom of each balloon and at an angle to bring them together near the bottom of the card.  If I've left enough room on the front, I'll write "Happy Birthday" otherwise that goes inside with a short two line verse "May your special day / lift you to new heights".

Alternatives:
  • When I don't have enough embroidery floss, I just draw the string with a marker (as in the photo above).
  • You could write the letters for HAPPY on the balloons - or if you make a big enough bundle of balloons on the card you could spell out HAPPY BIRTHDAY.
  • I've also used a balloon theme for birthday party invitations and thank you cards.
Additional Photos:
e4_balloonbdaysheet
The above image is of the sheets I make to store my templates with instructions so I remember how to make the card when I need more of the same one.  This version shows the card made with embroidery floss for the strings.

Monday, March 14, 2011

Holiday Decorations: St. Patrick's Day - Pseudo Stained Glass Shamrocks

Since St. Patrick's Day is only a few days away, I figured my first real idea post should be something with that holiday.  I don't really have any cards that I've ever made for St. Patrick's Day, but I do have some decorations.  I hope you like them.

E3_Shamrocks

Inspiration:  Hollo's Papercraft carries a lot of handmade papers.  Some that I picked up one time were basically two different color sheets with small shapes punched out every so often that were kind of pressed together.  I thought the paper looked kind of neat held up to the light and thought I'd make decorations out of it for our windows.

How I Make Them:  I started by going through my various stencils but couldn't find ones the right size for what I wanted.  I ended up using cookie cutters to create templates to use (see photo below).  I cut the outer shapes twice out of a thicker colored cardstock paper, and cut out the inside of each shape to make it an open outline about a quarter inch wide around.  Then I used the same template to cut out the shape in the handmade paper.  I glued an outer shape to each side of the handmade inner shape.  If any of the handmade paper was sticking out of the edges of the outer paper, I trimmed it.  Once dry, I tape the decoration to a window and enjoy.

Alternatives: 
  • Besides shamrocks, I've made these using flag shapes for 4th of July & Memorial Day, heart shapes for Valentine's Day, stars of David for Chanukah & Rosh HaShana, trees for Christmas, and crosses and eggs for Easter. 
  • Instead of using tape (which I know is not always good for windows), you could take an embroidery needle and a single strand of embroidery floss (most embroidery floss is 6 strands intertwined) and sew a piece through and then tie the ends to hang the decoration from. 
  • Another alternative would be use a vellum paper. 
  • One final thing to do would be to press crayon shavings between two pieces of wax paper using an iron and use that instead of the handmade paper for the inner shape.

Additional Photos:
e3_holdectemplates1
Flag & Shamrock Templates

Sunday, March 13, 2011

How I Got Started Making Cards

I guess I should start with some background.  So here it goes...

While I do remember having this toy as a child on which you would place 3 plastic pieces, cover it with a 1/2 piece of paper, close the lid, and then rub a crayon over that would help you create cards, I really didn't get into my current style of card marking until I returned to Ohio after graduate school.  A friend of mine introduced me to Hollo's PaperCraft.  I was in awe.  So much paper! 

I got a few items and decided I should make my own Christmas cards that year.  Let's just say before this I was a Gold Member of the Hallmark Store Loyalty program.  Included in that first purchase was 8x5 cards stock and papers in different colors.  The green paper I had chosen had a pretty neat texture to it.  So I decided to make wreaths.  I used a cup to get the basic shape and decides to rip the paper instead of cutting it so the edges wouldn't look so rounded.  I cut pieces of holly (or at least what I thought looked like pieces of holly - growing up Jewish I hadn't really even noticed holly before) and added them to the wreath that I put on the folded card stock.  I then proceeded to make 49 more (did I mention that I've always sent A LOT of cards).  I wrote Merry Christmas on the fronts with one of my scrapbooking markers (at the time I was still scrapbooking, though I've mostly given it up now).  Inside I wrote a short four line message that I no longer remember the exact text of but it was something along the line of "May your Christmas / be merry and bright / and your New Year / filled with delight".  Family and friends that I sent those cards to came back with a lot of positive response. 

I started making other cards - birthdays, Chanukah, anniversaries, Rosh Hashana, Thanksgiving, Valentine's Day, Mother's Day, Father's Day, everyday cards featuring poems I had written when I was younger (you get the idea).  I even expanded and made bookmarks with some of my poems.  I went to the paper store almost every month and really got into crafting again - making decorations for the holidays too.  One year, I decided to re-teach myself calligraphy and also took a Hebrew calligraphy class offered at the synagogue.  The next year, I made gifts for family members featuring mostly biblical verses in English and Hebrew - some of the others used song lyrics or a poem I had written with some hand-drawn artwork.

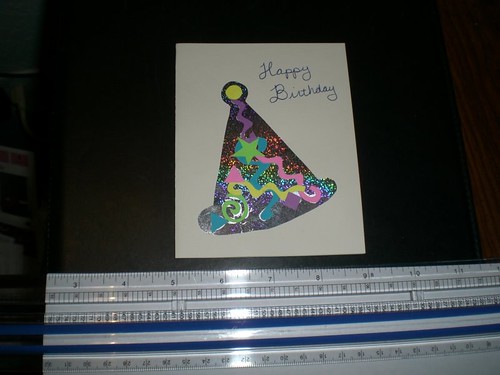
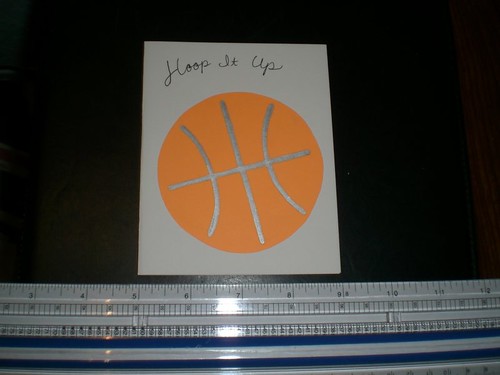
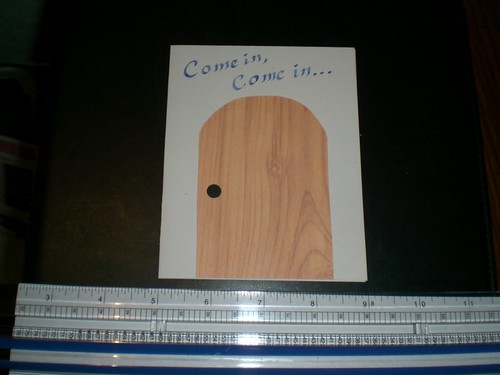
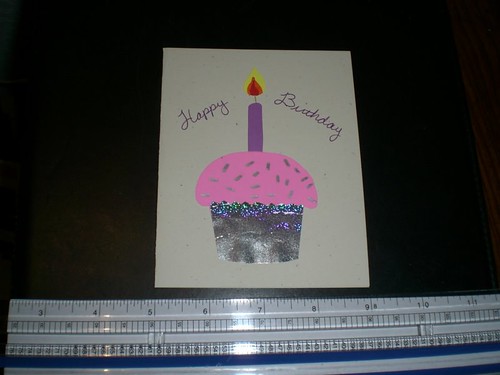
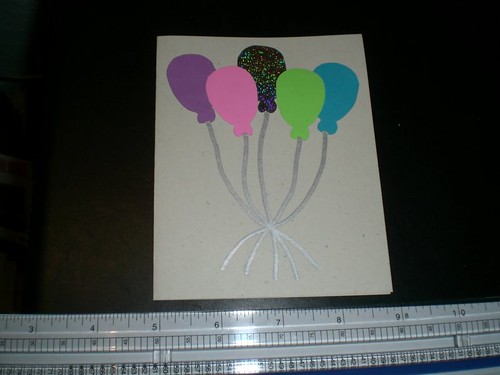
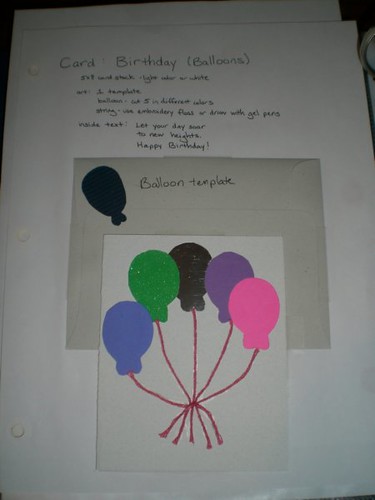
My cards have never been really fancy, though some have been more involved than others (you'll see once I start posting about them).  My intentions have always been to start with the 8x5 cardstock folded in half so that I could use a small but decent sized envelope and that the card wouldn't be too intricate that I wouldn't want to make the total number I needed.  This past year I made about 80 Christmas cards and 40 Chanukah cards to give you an idea of how many I do by hand.

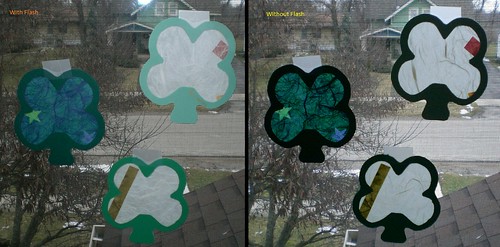
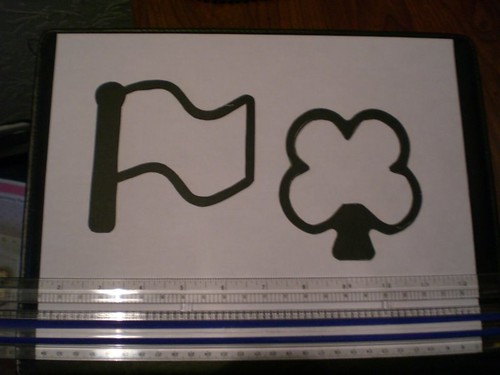
While I don't go to the paper store nearly as often, I still enjoy making my own cards to send to family and friends.  I usually send birthday cards to the children of my close friends, some cousins & nieces and nephews.  I send anniversary cards to family members on 5/10 year anniversary increments.  I always send Christmas cards and will alternate between Rosh Hashana and Chanukah cards for my Jewish family and friends.  Occasionally I remember to make and send other cards like Mother's Day, Father's Day, Valentine's Day, even St. Patrick's Day some years. 

So there you have it, a little bit of background.  I hope that gives you enough to understand the types of cards and other paper crafts I'll be posting about and want to read about them.  And I really do mean it that I'll start posting about actual card ideas very soon!

Saturday, March 12, 2011

First Post

I've been toying with the idea of creating this blog for some time now.  My biggest obstable has been figuring out how I'll have enough time to post consistently.  However, thanks to the encouragement of a few pen pals, I think I'm finally ready to get started.  I've got plenty of ideas to share.  Not just cards, also decorations, bookmarks and other paper craft items I've made over the years.  Please bear with me over the next month or so while I get used to what I can do with this blog - it might be a little while before I'm all set on the layout and have figured out how to get images up.  In the meantime, welcome and watch for a post about one of my card ideas soon!