Friday, February 10, 2012

Card: Valentine's Day - Shadow Hearts

VdayShadow

Inspiration:  I remember making silhouettes in grade school, probably for President's Day.  I'd also seen some lovely cameos lately and really wanted to do one of my daughter while she was little.

How I Made the Silhouette:  I tried to do the silhouette like I remember doing in school but the light I had made a very big shadow no matter where I put it and my 3 year old daughter was too squirmy to sit long enough for me to trace her shadow's outline.  So instead, I grabbed my digital camera.  She was very happy to pose for the camera even if I was only taking pictures of her shadow!  She loved looking at them on the camera's display afterwards.  I transferred the images to my computer and chose a few that I liked (I actually used 4 different ones for the cards so they wouldn't all be the same - some had her hair down and some had it up in a pony tail).  I used the free Picasa software to increase the contrast in the image and switch it from color to black and white.  I then pasted the images into Microsoft Word so I could size them how I wanted with the ruler gridlines present (so that the longest edge was no more than 2 inches).  Then I printed the page of images.  I made templates by cutting out the image.  I was going to add them to card stock and then recut but instead just printed them on a slightly stiffer paper.  I traced the template onto black paper and cut out my silhouette to use on the card.

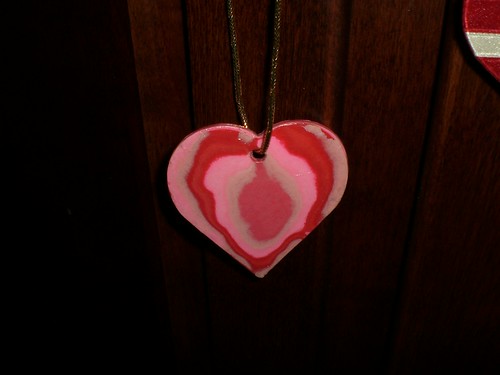
How I Made the Card:  I folded a piece of 5"x8" white card stock in half along the short edge.  I took my black already cut out silhouette and glued it to a heart.  Then I trimmed the edges a little to keep the heart shape.  I glued the heart with the silhouette onto a larger heart.  All the hearts were cut ahead of time using heart templates made from old die cuts.  I glued the larger heart to the card.  I added a smaller heart in the same color as the heart I glued the silhouette to.  I then wrote Happy Valentine's Day on the added little heart.  Inside the card I wrote:  "Valentine hearts and ____'s shadow bring greetings of love, kisses and hugs! XOXO"

Alternatives:
  • I could have done the silhouettes in color but wanted to go with the traditional this time.
  • With an older child you could cut out the silhouettes on white paper and have them color in their own face and hair.
  • Maybe next time, I'll do my husband and me too and we can have a shadow family photo on a card.

Additional Photo:  Below is the image from my computer after editing with Picasa.
shadow1

Tuesday, February 7, 2012

Decoration: Valentine's Day - Sanded Layered Hearts

sprub1

Inspiration: I remember making these in school a long time ago and wanted to try making one on my own.


How I Make Them: I cut my shape out of many pieces of different colors of construction paper (I used basic construction paper since it sands better). For the heart I used about 20 cut out shapes. For the butterfly shown below, I used at least 40. I punched the hole in each shape next, trying to get as close to the same spot as I could on each piece. Then I glued the layers together using Elmer's School Glue. I let that dry over night. The Elmer's School Glue causes it to warp a little - that's good! Warping will help when we smooth it out with sanding. After it's dried well, I start sanding. I took an old shoebox lid and taped a piece of fine-grit (120) sandpaper inside it. Then I sanded my piece from the flat sides. I did both sides, stopping every so often to dump the sanded off particles in the trash. This takes a few days to get done (my arm would get pretty tired from the sanding). When the front and back had the layers exposed in a way I liked, I took a piece of sandpaper and rounded the edges. I smoothed the hole a little with sandpaper around a skinny pen. I wipes the piece clean with a lightly damp paper towel and then let it dry overnight. The next day, I put a layer of Modge Podge on it. I let it dry overnight and then lightly sanded it and did another layer of Modge Podge. I repeated until I had done 4 layers of Modge Podge. Then I let it dry for a week (Modge Podge tends to be a bit tacky until it's really well dried). When it was well dried, I added a ribbon and was ready to hang it.

Alternatives:
  • Any shape can be used. I've made hearts, butterflies, moons and stars.
  • If you make it thick enough, you can use sandpaper to add more texture to the piece (though I tend to just try to get it flat).
  • Instead of Modge Podge, you could try a poly-urethane coating but it might yellow over time. If you don't coat it, the layers will eventually just peel off.
Additional Photo:
sprub2

Saturday, February 4, 2012

Decoration: Valentine's Day - Pipe-Cleaner Twist Hearts

Heart1

Inspiration: I wanted a decoration that I could make with my 3-year old. I thought she'd be able to twist pipe-cleaners and then I could shape the twisted lengths into hearts. She needed a lot more help that I anticipated, but we had fun making them.


How We Made Them: We took 2 pipe-cleaners of the same length in different colors. I initially made a few twists in the bottom (starting one pipe-cleaner about 1/2 inch above the other). Then I held the bottom and one pipe-cleaner. I had her wrap the other pipe cleaner around to where the first was. I made it a little tighter when I grabbed the pipe-cleaner she held and then handed her the one I had held. We kept switching back and forth with her leading a pipe-cleaner around the one I held. When we neared the end, I finished the twisting. Then I took both ends and twisted them together and finally shaped the circle into a heart.

Alternatives:
  • With some skill, other shapes for other holidays could be created.
  • We could have glued it down to paper when we finished.
  • I did make one with three pipe-cleaners braided. While this is more difficult, it might be fun for an older child.