Welcome to the LBK Card Creations Blog. I've created this blog to share my card-making and other paper craft ideas. All the cards I make are purposely created to fit in a regular postage envelope and to be easy enough to make large numbers of them. I don't really make one of anything. If you like an idea I've shared or have suggestions regarding it, please feel free to post a comment.
Sunday, November 21, 2021
Felt Ornament: Robot
Wednesday, July 14, 2021
Felt Ornament: Among Us Imposter?
Thursday, July 8, 2021
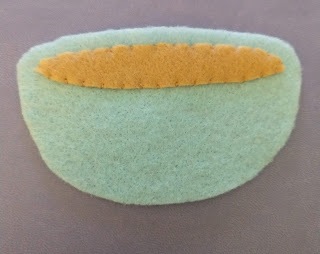
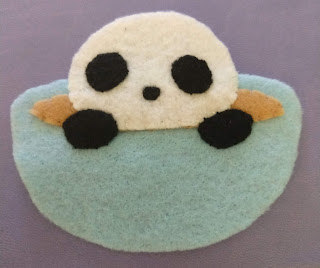
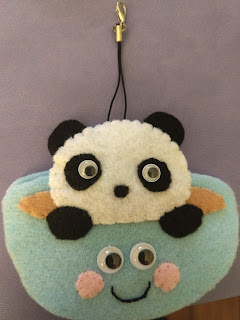
Felt Ornament: Panda in a Teacup
Tuesday, June 22, 2021
Review: Felt Solar System from PollyChromeCrafts (Etsy)
A friend and I decided to continue our Zoom-based crafting sessions to work on this cute Felt Solar System from PollyChromeCrafts available via Etsy. I purchased the PDF instructions (mostly because I don't want to work with glitter and really wanted to add google eyes). If you don't have the time or really want to spend the effort locating the supplies needed, PollyChromeCrafts also offers kits with all the supplies included.
As I mentioned, there were some modifications I wanted to make like using google eyes and avoiding anything glitter-based. For all the planets, I also used cut felt cheeks (except Mercury) rather than the recommended brads. I used the #4 circle from the provided stencils to size all the cheeks. For our ribbon, we used a dark blue (like the sky in outer space). I'll point out the modifications as I cover each planet.
We worked on our planets over 5 different Zoom sessions that ranges from 2 to 3 hours each (one might have been a bit longer and the last one was a little shorter but if you're planning something similar, give yourself at least one hour per planet). I put together kits with all the supplies for both of us, pre-cutting a lot of the pieces (the planets, anything where a stencil was in the PDF instructions), choosing thread colors, and filling little bags with the little bits needed for each planet.
When we finished, our solar systems turned out very cute. I'm glad I made two sets myself because my daughter (whose dream is to work for NASA when she grows up) took one of each as soon as they were finished.
Here's the details on the modifications along with the order we created the planets in:
Day 1: Saturn and Earth
Both of these were pretty straight forward. Other than the google eyes and pink felt cheeks, we mostly stuck to the provided instructions. For Saturn's rings, I found a sheet at Hobby Lobby (sorry I couldn't find it on their website but in the store it was right with all the glitter felt sheets) that more like gold sequins on fabric that glitter felt (and luckily it doesn't shed like glitter felt would). We used Alene's Tacky Glue to secure the google eyes and applique stitched on the cheeks using a light pink embroidery floss (as close a match to the felt as I could get).
Tip: My friend found it easier to remember to stitch in the ribbon holder by pinning it to each piece first (remember to do it in a way that will allow you to remove the pin after).
Day 2: Mars & Venus
For both of these planets, the original instructions called for glitter felt (Red for Mars and Yellow for Venus). Did I mention already that I don't like working with glitter (it gets on everything!)? For Mars, I found a really dark red felt and we also stitched on some Mill Hill Red Red Seed Beads (02013). For Venus, I couldn't locate a yellow that felt right so I got creative and picked out some gold holographic sequins. We stuck with the smooth round ones (holes near the tops) and only used the 2 smallest sizes.
Days 3 & 4: Neptune & Uranus
Day 5: Jupiter & Mercury
For these last 2 planets, we stuck mostly to the instructions. I had to stray a little on color but I was super excited to find Pumpkin Spice Felt to use for the big stripe under Jupiter's Red Eye. We both agreed that having one of the actual eyes as Jupiter's eyes was cute. I used smaller google eyes on these two than we had for the other 6 planets. For Jupiter it was so more of the Red would show and Mercury was just too small to use bigger eyes. Also for Mercury, we glued on small pink round gems for the cheeks rather than using pink felt since cutting circles smaller than the #4 stencil with the kit would have been difficult.
Overall, we both really enjoyed putting together this solar system. It took a number of Zoom sessions that we spread out over 5 weeks but they were fun to make and the finished product is very kawaii!
Tuesday, June 15, 2021
Review: DIY Gnome Kit by AmysFarmhouse (etsy)
To help fill in some time and get crafty during lock down, a friend and I were looking for things to make and found these really cute DIY Gnome Kits by AmysFarmhouse.
I chose the Coffee one and my friend chose to make a Bee one. This kits arrived with most of the needed materials and a piece of paper with the address to a YouTube video with the instructions.
Following the video, in addition to the supplied materials you also see 1-2 cups of dry rice. Instead of rice, we used Poly Pellets (I really don't like using food items in crafts). Many of the steps also used a glue gun. I don't have one so where I could, I sewed things together and if I really needed glue (like attaching the wooden nose), I used E6000 Industrial Strength Adhesive (it's lower odor than super glue and dries a little faster too). It took use a 2 hour Zoom crafting session to make our gnomes together.
My Coffee Gnome turned out really cute and now lives in the coffee nook of my kitchen/dining room. The was a great craft to do with a friend. There were plenty of choices and we could each make a gnome with a theme we liked. Even with minor differences (my friend's gnome kit had a black sock but mine was white and we had different charms to attach at the end), every kit takes the same steps to make and you can make alternatives work (sewing instead of using a hot glue gun for most steps like attaching the hat and the beard).
Sunday, June 13, 2021
Review: Origami Paper Dolls
When I bought the Origami Paper Doll Bookmarks in Japan, I also bought a set of Origami Paper Dolls. They're from the same company and very similar.
Having made the bookmarks first (which have smaller dolls) actually made making these easier. Most of my time on them was spent measuring and cutting the paper. More so that the folding and the little bit of gluing.
Again, I kept the paper scraps and will eventually use them for something. I also stuck with Alene's Tacky Glue and used very small amounts where called for.
Another tip I have is to use the end of a ruler when doing the folds. It made it easier.
When I finished making the paper dolls, I turned them into cards. So the recipients could see the back of the dolls, I made little windows in my cards so those parts were visible (sorry I didn't take a picture of it).
Monday, May 17, 2021
Review: Origami Paper Doll Bookmarks
I picked up this Origami kit when I was in Japan 4 years ago but if you're interested in it I did find it on Amazon.com. It sat in a drawer most of the time because when I first looked at the instructions I was a little overwhelmed and thought that maybe this would be too hard. I also thought I needed to get some more pieces (not really remembering why I thought that). With the lock down, I decided I had plenty of time to spend doing some crafting so I finally brought this out to try.
The papers in the kit are so beautiful (I've actually kept the scraps though I'm not sure what I'll do with them - any ideas?). Despite the instructions being in Japanese, the images really made it possible for me to do the kit (once I drilled in my head that all measurements were in CM or MM and not Inches). Some of the paper is really delicate so while I could cut some using my paper cutter for most things I really needed to use my scissors (so much harder to cut straight lines). I also found it easier to fold if I used a ruler to help.
There are some small points where it has you glue. I used Alene's Tacky Glue with just the tiniest amount and that held up pretty well and didn't cause any of the paper to wave (mostly because of using the tiniest amount).
The final bookmarks turned out awesome. My daughter immediately claimed one and we also sent one to my Mom. I sent one to a pen pal and I still have one left (for now).
As for how long it took, I took my time making this and spread it out over 4 days. I prepped by cutting the paper to the specified sizes before beginning any folding (to make sure I had all the pieces I needed). Since I was super careful to measure twice, cut once and because I worked slowly, I spend from 1 1/2 to 2 hours per bookmark. It was fun and I was pretty absorbed when I was making them.
Hope you like the picture of the completed bookmarks.
Tuesday, April 27, 2021
Cards: Origami Animals
How I Made Them: For the origami we just followed the instructions. When I finished, I used glue to secure them to folded 5x8 card stock.
They turned out really cute and it's been fun to get comments back about how much my pen pals liked getting them. They were really easy to fold so this would make a great kit for a beginner.
Thursday, April 22, 2021
Cross-Stitch: Lightning Astro
Inspiration: I wanted to make a small gift for someone in the Salesforce Community who is also a #PlatformChampion (former Lightning Champion) like me. I thought Astro in his Lightning suit with the lightning bolt would be perfect.
How I Made it: I took an image of Astro and used LunaPic to turn it into a Lego-ified image. Then drew it out on graph paper making some modifications along the way. I picked out embroidery floss colors based on what I had and started stitching.
What I'd change: I'm still not certain I like the background color. I made two and on one I used a dark blue but neither is really right. I don't like it just with no background because it's harder to see the little lightning bolts on the helmet and the arms are pretty pale.
Wednesday, February 3, 2021
Cards: Remaking Felt Ornaments as Cards
Just a little share. I took several of the felt ornaments I've made and reused the templates using paper to make note cards to send quick notes to family, friends, and pen pals. Some turn out better than others. Some I embellish with coloring to add background. Take a look:
 |
| Bomb Pop into a Thank You card for teachers. |
 |
| A Happy little Rainbow on a Cloud |
 |
| Fries and a Drink (always makes me hungry!) |
 |
| Llama - thinking about making a Happy Llamakah card next year |
 |
| I like this little fox |
 |
| Even my Salesforce character obsession gets in the ix with Earnie... |
 |
| ...and Astro with the Trailhead logo in the background |
Aside from the ones I made from felt ornament templates, I wanted to make one Salesforce character I hadn't done in felt, so I made a Codey the Bear as a Bearista card. I used different colors to add some variety. I've been using these to send to my Developer Group members.
Saturday, January 30, 2021
Felt Ornament: Snowman
Inspiration: Our neighbors have some nice traditions at the holidays. One couple stops by on Christmas Eve each year and delivers a bag full of cookies and a fruit/nut bread along with some yummy Bourbon Balls. Others just drop off cards, sometimes with cookies or a small gift. We often drop off hamantaschen during Purim (any where from early March to mid-April) and cards for different holidays. Given the stay at home orders this year and knowing many of our neighbors were staying home for the holidays and unable to celebrate with their extended families, I made extra little ornaments to drop off with our cards.
How I Made Them: Like most of my ornaments, I started with making templates. I made one for the body/head that was a slightly smaller circle above a larger one. I made a template for the hat and the hat band and one for the carrot nose. Using the templates for each snowman, I cut from felt:
- two white bodies
- 1 black hat
- 1 orange nose
- 1 colored hat band
Alternatives: There are so many ways to be creative with these. Besides switching eyes between googly eyes and pony beads, other things I might try in the future include:
- more than 2 buttons if they're smaller
- finding a way to incorporate small twigs as arms
- adding a flower to the hat (like Frosty's in the animated classic)
- Finger weaving or knitting small scarves to use instead of fabric
- Adding a small ribbon smile
- Seeing if I can find something that looks more like a carrot for the nose
Thursday, January 14, 2021
Felt Ornament: Turtle
Inspiration: I don't know about you but between the weather and doing pretty much everything at home, I'm starting to get some cabin fever. I'm also running out of ideas of things I really want to make. Last week, I just had a day where I felt like I needed to make something and I wasn't quite sure what I wanted to do. I remembered this cute little turtle my daughter used when we were creating a Scratch program, so I decided to use that to make my next piece.
How I Made It: I printed 3 copies of the image. Then I cute them out. I cut out parts, traced out templates with card stock. Then cut and traced some more until I was pretty sure I had all the pieces I was going to need. (It really wasn't very many - body, back, back edge, front leg, 2 back legs, tail, cheeks, and some spots). I looked through my current felt supply and decided on colors (mostly greens) and I used the templates I created to cut out the pieces. I sewed the pieces together using embroidery floss and applique stitches. I sewed the 2 body pieces together with blanket stitches, pausing to add a hanger (lobster clip with a loop), and to give it a little Polyfill stuffing. I finished it by gluing on googly eyes.
Things I'd Do Different: I kind of think the head part is a little long from the body so I might reshape if I want to do over or else reposition the spots so it looks better. I could also add in some embroidery stitching to make the turtle's back a little more elaborate.


