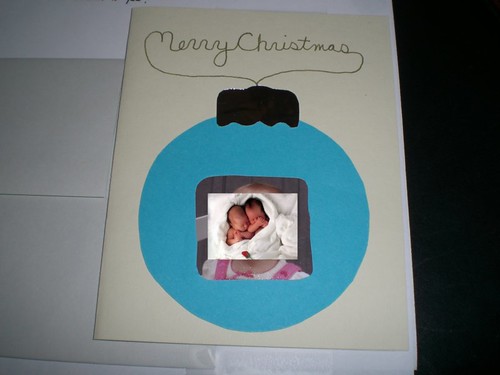
Inspiration: This is the card I used last year (Christmas 2010) so I could include a photo of my daughter. Sorry, but I covered over her image on purpose. Basically, it was the first idea I had for being able to integrate a smaller photo frame into the card and I went with it.
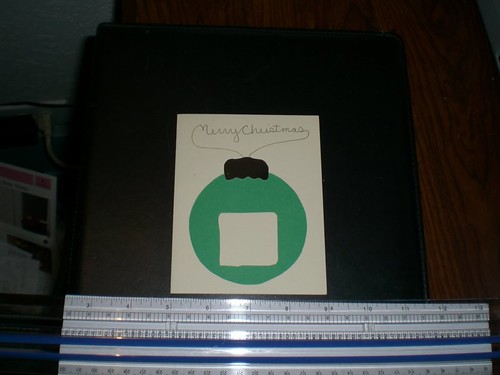
How I Made Them: I used a scrapbooking circle template that had about a 3" diameter and cut out circles in bright colored paper for the overall ornaments. I measured and cut out a 1.5" square near the bottom of the cut out circles, rounding the corners as I cut it out. I glued the circles to the folded cardstock using basically only 3 small drops of glue (at the bottom and each of the 2 sides) so that the photo area and the top would be open to add the photo later. I cut out the top of the ornament by making a quick template and then using a shiny silver cardstock. When I was ready to add the photo, I trimmed it to be just larger than the opening and slid it into place. I used a little glue on the back of the photo so it would slip around and a little glue near the top of the ornament to "close" the frame. Then I glued on the silvery top of the ornamet and drew the ornament's hanging string using a gold gel pen and having it include "Merry Christmas" in cursive (kind of like on my lightbulb cards from the previous post). When I remembers, I wrote my daughter's name and her age on the ornament under her photo. Inside I added the following verse:
"Happy family memories
both old and new
Friends gathered near
a lot or a few
All share good cheer
With the holidays here
As we send our love
this season to you!"
Alternatives:
- The photo could even be of a beloved pet, the whole family, or even more special, one of you along with the person you're sending the card to. Be sure to add a label on the ornament so no one will forget what or who is in the photo.
- If you don't have shiny silver cardstock or paper, you could always cover a small piece of cardboard with aluminum foil.

This shows you the ornament before the photo was added. I just placed the top of the ornament in position for this photo without gluing it but I did add the hand-drawn ornament hanging string before adding the photo to save time later.
No comments:
Post a Comment
Thanks for leaving a comment. It will be posted as soon as I've had a chance to review it.