Thursday, December 12, 2013

Sewing Project: Teapot

Teapot

Inspiration:  For my daughter's tea party themed birthday party, I planned on having the kids play "Hot Teapot".  I didn't want to use either of the china teapots or her plastic Strawberry Shortcake one.  I knew I needed to sew one that was softer.

How I Made It: I thought about just taking an online image and making it more like a pillow but ended up searching for teapot sewing patterns and came up with the following:

I used multiple colored fabric (see image above).  I also machine sewed most of the pieces and only hand-sewed to close the teapot body, close the lid circle, secure on the button top and attach the lid to the body. The whole thing only took 1 evening.

What I'd Do Different:
  • I'd definitely make a longer body.  Mine looks more like a Genie Lamp than a teapot.
  • I'd secure the spout on a little more closer to the top so it's more upright.
  • I wanted to add a little hidden pocket to put in a prize for the kid who is holding it when the music stops, but I ended up not doing that.  It probably could have been done with some material into the top and using velcro to secure the lid to the top of the teapot.
Sunday, December 8, 2013

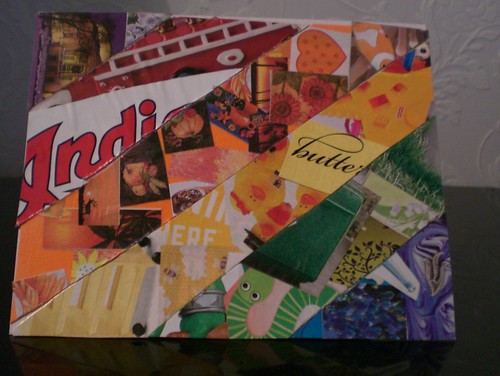
Cards: Rainbow Collage Stationary

RainbowCollageCards

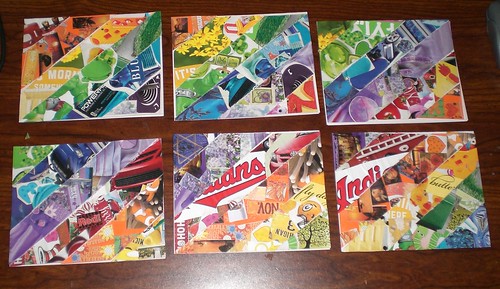
Inspiration: My daughter had to collect magazine cutouts in various colors for school.  I cut out a lot more aside from what we sent thinking it would be fun to do similar things with her at home.

How We Made Them:  I cut out 4"x5" rectangles on colored paper - one for each color we were going to work with (red, orange, yellow, green, blue and purple).  My then 3-yr old daughter helped place on images matching that color after I Modge Podge'd the sheet.  We let them dry under some heavy dictionaries and then forgot about them for a year (you can skip the forgot about them step after they dry).  From the back side of one of the rectangles I drew the diagonal and then measured about 2 & 4 centimeters from the diagonal to draw parallel lines.  Once I had all 5 lines drawn, I held the 6 cards together and carefully cut them along the lines making 6 pieces of each color.  I arranged them in rainbow order and glued them down to cardstock (5"x8" folded in half).  I glued them down, trimming where I needed to in order for the strips to sit closely together.

Alternatives:
We really like doing collage work - it's really easy for her.  However now that she's almost 5, she's a lot more sophisticated with her art and wants to add other materials.  If we were starting these today, we'd definitely have to add other materials like:

  • stickers
  • ribbon
  • gemstones (one of her favorites)
  • googly eyes
  • foam shapes (at least their sticker backed most of the time)
  • fabric
  • felt
  • anything else you can thing of that you can glue to paper!
Additional Picture:

RCCCloseup

Sunday, October 20, 2013

Cards: Spring - FlipFlops

FlipFlop

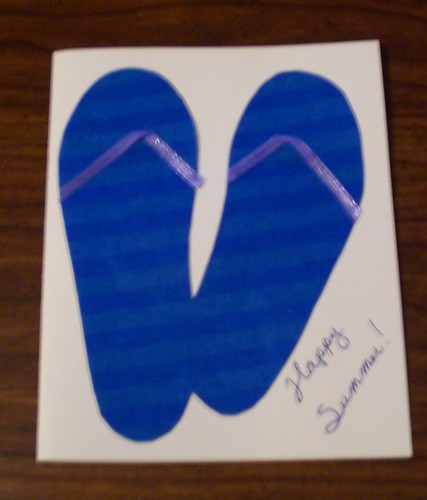
Inspiration:  Staying on the theme of shoes to cover the four seasons this year, I chose flip flops for summer.

How I Made Them:  I found an flip flop image online (Goggle image search) and printed that out to use for my template.  I cut out the main shape from handmade papers in blue or purple.  I glued ribbon onto the shape to be the part you slip your foot under.  Glued the shape to the card and wrote Happy Summer with a gel pen.  On the inside, my verse is:
Open-toed on the
  open road
Out cruising
  top-down towards
Orange sunsets over
  sandcastle spotted beaches.

Alternatives:


  • If I had then, I would have used cardstock that was closer to sand in color.
  • Footprints in the sand might have worked too.

Tuesday, March 12, 2013

Cards: Spring - Rain Galoshes

SpringCard4

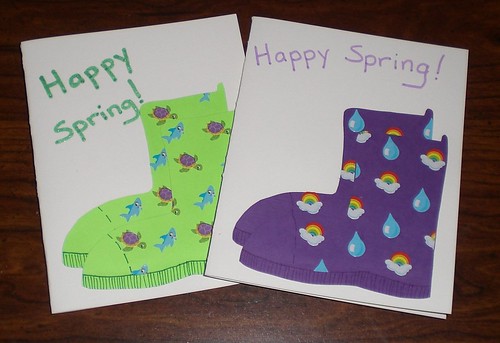
Inspiration:  Since I used ice skates for winter, I decided to stay on the theme of shoes to cover the four seasons this year.  What says spring more than rain and galoshes!

How I Made Them:  So I often start by sketching out a concept card. Here is a photo of that concept card.  Even came up with the inside saying before actually making my cards.  Here is a photo of the inside of the card.  I did cut out the boot shape from my concept card to act as a template for the boot.  Then I work on cutting out the boots, trying to get as many on a sheet of paper as possible.  After getting the boots cut out, I glued them together and added the stickers.   I went to Education Avenue to get the sticker (teacher or educational supply stores are a great source for stickers).  As you can see in the photo, I used a gel pen to add the lines for the sole of the boot and to separate the toe area. Then I glued the boots to the card, used a Martha Stewart Glitter Marker to write Happy Spring! on the front.  On the inside, I wrote my little poem:
Laughter reigns while
  puddle jumping and raindrop dodging.
Little snowdrops and green
  bulb plant stems dot the ground.
Loving Mother Nature blankets
  us in a rainbow of hope.

Alternatives:

  • I thought about putting mud on the boots.  (Not real mud, just drawn/colored on mud).
  • I also thought about using muddy boot prints instead.
  • Bunny slippers might have also been fun as a spring-themed shoe.

Wednesday, February 13, 2013

Cards: Valentine's Day - Office Notes

OfficeVday

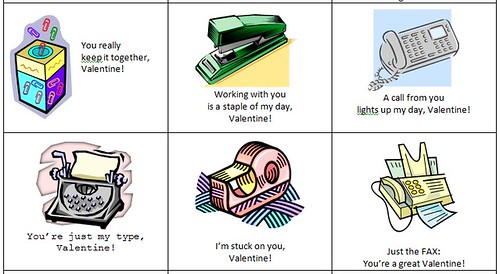
Inspiration:  Since my 2nd job post grad-school, I've always handed out little Valentine's.  I started always including a butterfly, but have since moved on to other things.  This year when I saw a blog posting by a pen friend of a typewriter valentine I was inspired to use office equipment.

How I Made Them:  These were simply made in Microsoft Word.  Just added a table and played around with the sizing of the rows and columns.  I used free clipart images I found on the web and then added little Valentine-like sayings.  Printed them on cardstock so they weren't just regular paper and cut them out.  Signed me name and I'll hand them out at work tomorrow.

Alternatives:
  • I could list so many other themes to try: fruit, candy bars, soda pop brands, animals, comic book characters, shapes, exotic coffee flavors (I'm totally thinking about using this one next year), fast food restaurants.  Just have fun making the little sayings!

Sunday, February 3, 2013

Card: Valentine's Day - Grapes

VdayGrapes2

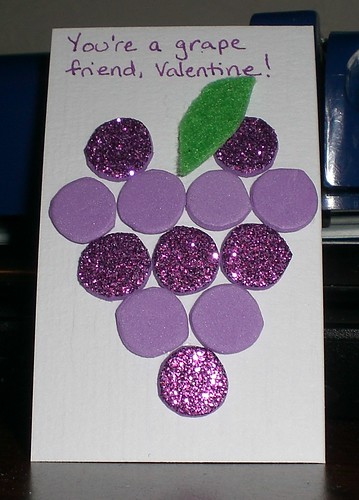
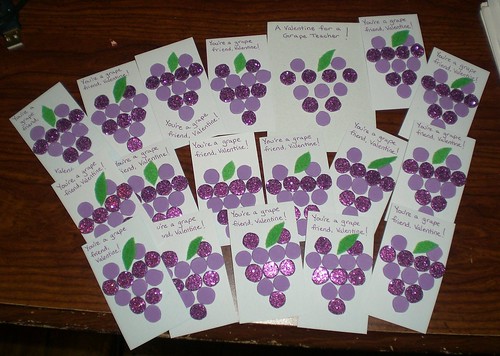
Inspiration: After last year's strawberry hearts, I wanted to come up with something in a similar vein.  Something with a heart shape - I thought about doing Luv Bugs, but I think I'll save those for next year.  Instead I thought, a bunch of grapes can have a heart shape.  But I didn't like the idea of cutting out lots of circles in felt.  Luckily I remembered all the foam projects my daughter has been doing and went in search of materials.

How I Made Them:  As I mentioned, I used foam pages.  One plain purple and one glitter purple.  I used a  plastic tube I had from something, it was about the size of a small test-tube.  I pressed this into the back side of the foam and then cut out the circles with scissors.  If I had a large enough circle hole punch, that probably would have worked better.  I did use some sticky-back stiff green felt to do the little leaf which I just free-hand cut out.  I used pre-cut bookmarks I got at Hollo's (they were 2 inch by about 7.5 inch) and cut them down to 2 inch x 3 inch pieces.  I glued on the circles (alternating rows between plain and glittered) and then stuck on the leaf (peel back and stick, so easy).  I used purple gel pen to write "You're a grape friend, Valentine!"  I'll have my daughter sign the backs before she takes some to preschool on the 14th.

Alternatives:

  • Other fruits (raspberries - though that one might have trouble coming up with a nice saying), orange slices (Orange you a smiley Valentine!), bananas (in a smile! - I go bananas for you, Valentine), pineapple (make it heart shaped)...
Additional Photo:

VdayGrapes

Saturday, January 12, 2013

The Back of the Card

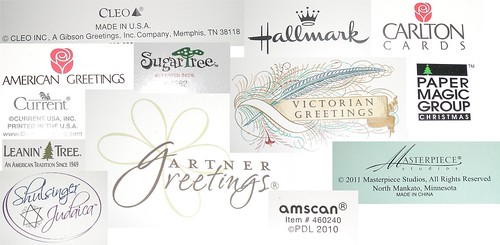
Do you remember those Hallmark commercials that always showed the main character turning the card over and then smiling really big?  I admit it, I usually turn my cards over.  Not specifically to see the brand, but sometimes even I write on the back a little.  Though often, I'm just recording something on the back like the date the card was received or the address of the sender so I have it for later.  But this topic got me thinking, how many different brands are there?  I don't think I'll ever know and I'm pretty sure that during the holiday season a whole lot of little brands pop-up for the short term.  Ones I never hear about the rest of the year.  So here's a collection of the backs of cards logos from this past holiday season:

CardBacks

Quite a variety and also the usual players as well.  I didn't get a single Papyrus card though, I usually get at least one so I don't have that logo.  Don't even know what other ones I'm missing.

So ever since I started making my own cards, I've always put my own little logo on the back.  I remember getting home-made computer-generated cards when I was in Jr. High and High School.  The creator would add their own little logo to it (usually a little comical).  I've always done mine hand-written, in gold ink with my initials.  So if you get a card from me, now you'll know how to confirm it.  Just turn it over to see:


MyCardBack

Do you add your own logo or signature to the cards you make on the back?  What's it like?

Saturday, January 5, 2013

Cards Received

CardsDec2012

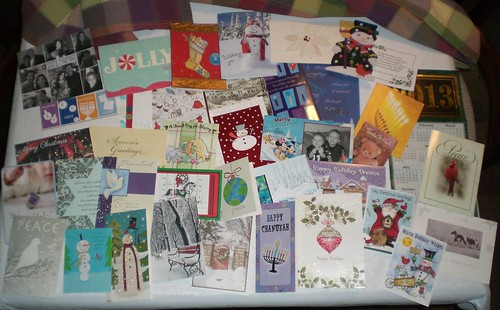
I can no longer keep track of how many cards I send out every year.  I know in December it was over 80.  Then add in Birthday, Anniversary and other holiday cards throughout the year and I'm sure it's well over 200.  I love to get cards too.  Despite how many I send out, it seems we never get even half that number in return.  The picture above is all the cards we got in December.  There are 39 of them.  Not quite half of what we sent of our Winter cards.  I love how they look all together and how they looked taped up around the windows of our dining room.   It makes the room so cheery. 

I'm also amazed at how often we get through a holiday season without receiving a single duplicate card!  How often do you get the same card from different people?  I remember it happening more often in the past than it does know.  For our wedding (15+ years ago), I remember getting a couple pairs of duplicate cards as my bridal showers and at least 2 of the same card at our wedding.  I've saved pairs of birthday cards (often given in different years) of the same card from each of my grandparents (Hollie Hobby playing a violin - I still have it somewhere).

I love the uniquely handmade cards.  We don't get too many of those - maybe 2 or 3 a year but only 1 this year in December.  Though I could do without the glitter cards.  I'm sure I'll find glitter in my house well into the year.  I wish there was a better way to keep glitter on cards without it ever flaking off - then I'd consider using it myself.

I love photo cards.  It's need to put together multiple years worth of photo cards from the same family and see how everyone has changed over the years.  I always save these.  Along with the letters some people send in their cards.  It's neat to go back and see what happened when (useful for genealogy research too!).

Plus the trends to do more 3-D style effects in cards.  I try not to do too many of them when I make my cards since I know the postal service uses machines to sort and I wouldn't want a pretty 3-D effect flattened.  I'm always amazed when they arrive in tact and not flattened.

What are your favorites?  What do you like about the cards your receive or give?  Is it more about pizzazz for you or do you like personalization more?