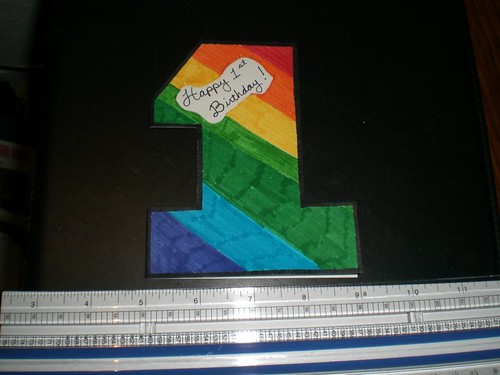
Inspiration: I always like doing a number card for a birthday. I also love getting cards like this. Why? Because I keep many of the cards we receive. For my daughter, it makes it very easy to quickly remember which birthday a group of cards is from when at least one of them has her age on it.
How I Make Them: The first time I made a "1" card, I created a template from a folded card using a ruler to measure out where I wanted to make my cuts. Since then, I just trace the template. Of course, I make sure I leave plenty of room where the fold is so that I don't end up with 2 pieces. I like to outline the number with a thick, dark marker and then fill it in with decorations. In the example above, I colored in markers in rainbow order. I've also used color pencils for a more pastel tone or stickers for a child who really liked a certain character. I finish up by writing "Happy 1st Birthday!". I usually leave the inside of this card blank so I can write a personal message to the recipient.
Alternatives:
- As I already mentioned, one of the great things about large outlined letters is that can be decorated just about anyway with any material: coloring, stickers, ribbon, even pom poms or buttons!
- Any number can be used. I'm even thinking about using a 50 for my husband's birthday in a few years (he he he!).
- The number can be the Happy Birthday Card or even the invitation.
No comments:
Post a Comment
Thanks for leaving a comment. It will be posted as soon as I've had a chance to review it.