Friday, May 27, 2011

Card: Birthday - Planets in the Sky

e35_planetsbday

Inspiration:  My inspiration for this card actually came from the paper I used as the background.  It's origami paper that's a dark blue with lots of little gold stars on it.  I thought it looked like outer space.

How I Make Them:  I trimmed a piece of the origami paper to fit the front of the card.  I cut out circles in different sizes for the planets - at least 2 smaller and 1 larger.  I cut the ring around the one planet out of silver reflective paper.  I glued down the planets and ring after laying them out.  I wrote "Happy Birthday" on one of the planets.  On the inside, I wrote "May your birthday be out of this world!"

Alternatives:
  • I imagine when I'm out of my origimi paper I can either find similar scrapbooking paper or just use a darker cardstock and draw on gold/silver stars with gel pens or Sharpies.
  • The planets and rings can be in any color.
  • If I was a better artist I could even add a space ship or satellite.

Wednesday, May 25, 2011

Card: Birthday - City at Night

e34_citybday

Inspiration: I had a lot of small darker scraps of paper and wanted to find a way to use them.  I came up with this idea of doing buildings.  Since they were dark, I figured a city skyline at night was the way to do.

How I Make Them:  I start by gluing a darker blue piece of paper to my card.  I cut out various sized rectangles from scraps of dark paper and glue those on to look like buildings of different sizes.  I have a hole-punch that creates small 6 small rectangles in a row that I used with yellow paper.  I glue these onto the rectangles to look like windows with lights on. I draw on stars using a silver Sharpie and wrote "Happy Birthday".  Inside I write, "Hope you have a fun birth day that continues with a starry night!"

Alternatives:
  • The city skyline could be used for an invitation for a night out on the town, a girl's night, a bachelorette party, or whatever else you can think of.
  • It would make a nice image for a Thank You card for someone who hosted you during a recent visit to their town.
  • If you really want to embellish with details, you could draw in antennaes on the tops of the buildings or have some that aren't quite so rectangular.
  • A new home card could have tall buildings on the sides in silhouette and then a small little house in the middle in silhouette with a message along the lines of "Welcome to the neighborhood..." on the outside and on the inside, "we hope you'll grow to love it like we do!"

Monday, May 23, 2011

Learning Aid: Flashcards - Hebrew Letters

e33_alefbetflashcards

Inspiration: I just made these a little over a week ago and I'm super excited about them.  We had a small party to celebrate our daughter's first haircut (similar to the traditional Upsherin held for Jewish boys at age 3).  Part of the tradition for the first haircut is that Jewish children start learning about their culture and more specifically, the Hebrew language.  I thought this would be a great time to start teaching her the Hebrew Aleph-Bet (letters), so I made some flashcards.

How I Made Them:  I used old business cards that I had from a previous job and calligraphied each letter onto a card.  I used a Coit 3/8" calligraphy pen and black India Ink.  I took a 2nd card (since I couldn't use both sides) and wrote the name of the letter, it's sound as related to English, and a word that begins with that letter in Hebrew (I didn't take a photo of the back because they don't look nearly as good!).  I taped the two cards together to hide my old business card and then laminated them using my Xyron ez-Laminator.

Alternatives:
  • I know I can get business card sized paper at Hollo's Papercraft.  That would have worked better with the laminator as the double-thickness of traditional business cards might not hold up as long as I'd like.
  • I could have colored the letters with gel pen after doing the calligraphy with the black just so that it might hold her attention longer.
  • Flashcards can be made of just about anything.  My daughter is almost 2 1/2 so letters, numbers, colors, and shapes would all be great things to start with.  For preschools, cards about weather, common objects, animals, etc. would also be good.  Of course, vocabulary words are always great for school-age children to practice with.  I'm even toying with making a set for creating words when she's ready - with a blank followed by a-t (e.g. _at) and then smaller letter sets to match in front (e.g., c, b, f, h, th, ch, m, gn, s, wh, etc.).

Saturday, May 21, 2011

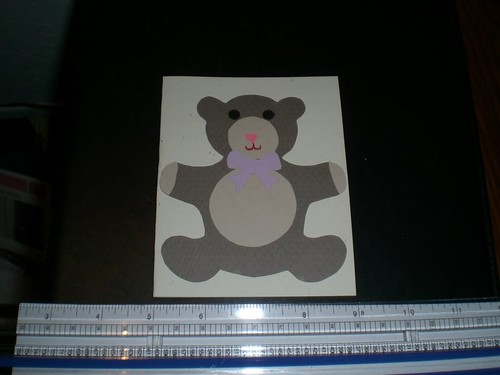
Card: Birthday - Teddy Bear

e32_teddybday

Inspiration: Teddy bears are so cute and cuddly, the perfect image to wish someone a happy birthday with!

How I Make Them:  The overall shape I found in one of my older scrapbooking stencils - it was on a sheet with a baby theme.  I cut that out of a darker brown.  I embellish it with lighter brown or tan on the upper paws, belly, and snout.  I used a hole-punch to punch out black eyes.  I also used a small scrapbooking stencil to cut out a bow in purple (or pink or blue).  I drew on the mouth and nose using gel pens.  Since the teddy bear took up most of the space of the card, I didn't write on the outside.  On the inside, I wrote "Hope you have a cuddly, fun birthday!"

Alternatives:
  • A teddy bear is also a great image for a Get Well card.
  • Using a pink or blue ribbon, it could be used to welcome a new baby or as a baby shower invite or thank you card.
  • I think it might be neat to make the teddy bear in some of those paisley type colors that you sometimes see stuffed animals in (kind of like a calico cat).
  • You could use small jewel stickers for the eyes & maybe even the nose.
  • Tan or light brown embellishments could have also been added to the ears and legs.
  • To make it even more festive, the bear could have worn a party hat!

Thursday, May 19, 2011

Card: Birthday - Silk Flower

e31_flowerbday

Inspiration: I really thought that flowers would look kind of nice with my silk method.  But I'm a little disappointed in these.  They just didn't turn out as cute as I'd hoped.  If anyone has suggestions to improve on this idea, please share!

How I Made Them:  For a good recap on how I did the silk part, refer to this post.  When I sewed the flowers to the cards using embroidery floss, I tried to match the floss to the color of the petals and sew in the details of the petals.  I wrote Happy Birthday using a green gel pen and tried to make it look like the leaves coming out from around the flower.  The inside message was a simple "Have a sweet birthday!"

Tuesday, May 17, 2011

Card: Birthday - Silk Car

e30_carbday

Inspiration: When I was doing the last of my silk painting, I thought a car would be a cute shape for a card for a little boy.

How I Make Them: For information on the actual silk painting, refer back to this post. After the silk painting is dry and I've cut out all the images, I sewed the car onto the card using embroidery floss.  Then I wrote the sounds that various car horns make all around the image in different colors.  On the inside, I wrote "Just letting everyone know that today is your birthday!  Hope it's a car-honking happy one!"

Alternatives:
  • Eventually I plan on making a car card using my more traditional methods (templates and paper), I just have to find the write shape of car to draw.

Sunday, May 15, 2011

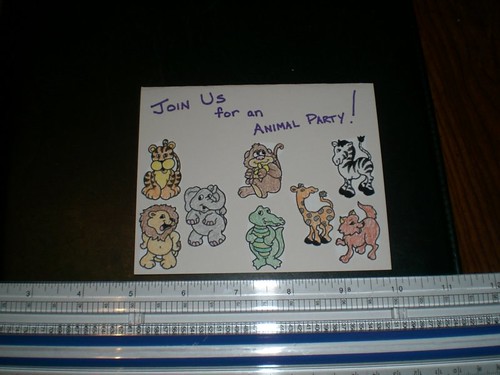
Card: Invitation - Animal Party

e29_animalinvite

Inspiration: For my daughter's 2nd birthday party, we chose an animal theme.  We got lots of nifty little things through Oriental Trading.  And we decided that the party games should all be easy carnival style games.  I even made a monkey with an open mouth and banana bean bags (I'll post on this one another time).  For the invitations I wanted something with animals and found a coloring page online that I used for the animal images.  I wish I had saved the link as I can't locate the page now.  If anyone comes across it, let me know. Or post your favorite color pages link in the comments!

How I Made Them: As I mentioned, I printed a cut out a page of animals to color that I found on-line.  There were about 18 different animals on the page but I used a subset of them.  I colored the animals using colored pencils and then trimmed them a little closer to their edges before affixing them to the card with glue. I wrote "Join us for an animal party!" on the front and wrote the details about the party on the inside.

Friday, May 13, 2011

Card: Birthday - Music

e28_musicbday
Inspiration: I love music (started college as a music major).  Plus I have a number of friends that I send cards to who also love music.  I decided to go with a music staff since I couldn't draw everyone's instruments (I do an ok violin/viola but definitely can't draw a trombone or a piano).

How I Make Them:  I use the leftover stencil from some music note die-cuts from a Creative Memories set I got along time ago and cut out notes in various bright, rainbow colors.  I try to get a nice mix of quarter notes, connected eighth notes and single eighth notes.  Occasionally, I'll cut off the stem for a whole note or divide the flag on an eighth note to make a sixteenth note - just depends on how creative I'm feeling.  I the draw the staff on the card by using 5 markers each of the same size.  I use a long strip of masking tape to help hold the markers together in a row to help me evenly space the lines.  Then I glue on the notes.  I write "Happy Birthday" on the outside of the card.    On the inside, I write "May the soundtrack of this special day lift your spirit!"

Alternatives:
  • This card can be used as an invitation, would even make a really neat recital invitation.
  • It also makes a nice Thank You card.  You could even write the letters to spell out T-H-A-N-K-S or T-H-A-N-K-Y-O-U on the notes depending on how many you put on the staff.
  • Since music is a theme with many holidays, if you use holiday-themed colors it might make a nice Christmas or Chanukah card.  You could even add a favorite lyric under the music staff.

Wednesday, May 11, 2011

Card: Father's Day - Sailboat

e27_sailboatdad
Now that Mother's Day is behind us, I figured I'd get a head-start on Father's Day...

Inspiration:  I've seen lots of Father's Day cards with sailboats and often have a hard time coming up with something to make that works well for both my Dad and my father-in-law (not to mention my grandfathers).  So one year I decided to see if I could make my own sailboat.  I don't think it turned out all that bad.

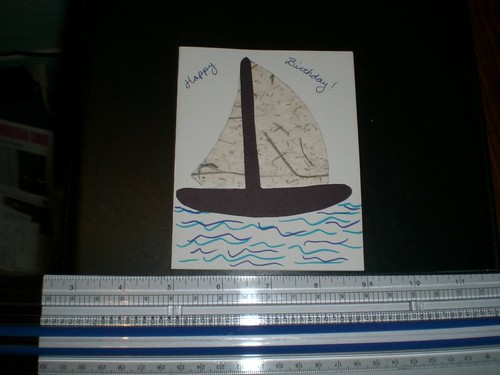
How I Made Them:  As with many of my card, I made my own templates for this one but based them on a scrapbooking stencil.  The stencil I used was meant for journal writing entries in a scrapbook.  I ended up turning it into 2 templates - ones for the sail and one for the body of the boat along with the beam.  Also I got really lucky finding some wood grain paper to use (though if you look at the additional photo below, you'll see I try to use darker browns when I don't have wood grain paper).  I also tend to use hand made paper for the sail as I think it looks more material like.  I glue the sail and then the body/beam onto the card.  I usually draw on the waves using a number of different blue gel pens or markers.  Sometimes I add a sun in the sky.  Then I write "Happy Father's Day" on the outside. On the inside I write "Sail through your day!"

Alternatives:
  • This makes a good birthday card.  The example under additional photos below is a birthday card.
  • It might be cool to use blue cellophane or tissue paper for the waves (I'll have to try this sometime).
Additional Photo:
  • e27_sailboatbday

Monday, May 9, 2011

Product Review: Orbis Circle Scissor

e26_circlescissor
I received the Orbis Circle Scissor as a gift from my mom years ago.  However, I haven't used it very often as I tend to find it easier to use the various templates and stencils that I already had.  The concept of the circle scissor is wonderful.  Being able to cut out perfectly shaped circles from photos or craft paper without having to trace first, great idea!  The scissor has 125 sizes labeled from 25 to 150, the numbers are meant to represent the size of the circle in millimeters (though I've never actually measured one to check).  It came with 3 blades for the pen and they have been fairly easy to change.  It also came with a self-healing cutting mat.  Overall, it works ok.  My biggest problem is that most of my papers that I try to use with it are larger than the circle cutter.  Why is this a problem?  The outer edge of the circle cutter is where it grips to the surface and unfortunately, it doesn't grip well to paper.  As long as the paper you are cutting fits within the overall circle, it works great.  Though I have read some complains even about that on-line.  There was a useful suggestion to create a glass cutting surface and that it holds to position better that way.

So my final take on the product, it's probably better for working with smaller papers, like photos.  So if you do a lot with scrapbooking or where you start with smaller pieces of paper, this product is great.  If you're working with larger papers (8x11, etc), you might want to stick with templates and stencils.

Thursday, May 5, 2011

Bookmark: Hebrew/English Calligraphy - Words from the heart

e25_heartbookmark

Inspiration:  Another quote I like.  This one comes from the Talmud.  "Words that come from the heart, enter the hear."

How I Make Them:  Again I use a pre-cut 1.75 inches by 6.5 inches bookmark from Hollo's Papercraft.  This time I use it horizontally.  I draw my pencil lines from the top at 1MM and then 2 lines every 9MM after that.  From the bottom I draw them at 1MM, 5MM, 6MM, and 10MM.  I calligraphy this bookmark in either red or pink ink (usually Speedball ink for the red and self-mixed watercolor paint for the pink).  I write the Hebrew letters using a C-3 Speedball nib and a Hunt Ex-Fine Bowl 512 for the vowels.  I write the English using a C-4 Speedball nib.  After the calligraphy ink has dried, I draw a small red (or pink) heart using either the ink or gel pens.  Finally, I laminate the card using my Xylon sticker laminator.

Tuesday, May 3, 2011

Card: Birthday - Roller Skate

e24_skatebday

Inspiration:  When I was a young girl, I wanted a roller skating party so much.  I finally won one at a Girl Scout roller skating event.  I loved my roller skating birthday party.  I even worked at a roller rink while I was in college.  So when I was thinking of what kind of card a 9 or 10 year old girl might like, I thought a roller skate would be pretty nice.

How I Make Them:  I made my templates for the boot and the metal brace at the bottom.  I use a circle scrapbooking template for the wheels, though I used to use a Circle Scissors.  The wheels are usually black or reddish-orange (the only color wheels I remember having on my skates as a kid).  For the metal brace, I try to use a metallic silver paper but will use a light gray if I'm out of metallic.  I make the boot either purple, pink or an aqua blue.  I glue the wheels on first, then the metal brace and finally the boot slightly overlapped on the metal brace.  I draw on the laces using a marker colored close to the color of the boot.  Then I write "Happy Birthday" on the front.  Inside the text is "May you roll happily along on this special day!"

Alternatives:
  • If I ever get to throw my daughter a roller skating birthday party, I'll use this card design for the invitation.
  • You could make a low-cut sneaker-style skate which would have more pieces/parts but allow for the use of additional colors.
  • Using 4 wheels in a row instead of 2 would make it a rollerblade.
  • Extending the metal brace to include a blade would make it an ice skate.

Sunday, May 1, 2011

Card: Mother's Day - Butterflies

e23_btrflycard1
Mother's Day is right around the corner.  Here's a quick idea for you.

Inspiration: I love butterflies.  I decorated my craft room with them, but it's now my daughter's room.  So I had to make a card with them.  And since butterflies are beautiful, who better to share their beauty with then Mom.

How I Make Them:  The first time I made these, I used scrapbooking die cuts in various sizes and shapes of butterflies.  I just glued the shapes randomly to the card.  Now, I use the original paper surrounds from the die cuts as templates to make more butterflies.  Sometimes (as in the additional photos linked to below) I use butterfly stickers too.  The front of the card says "We're all a-flutter...".  The inside says "...to wish you a Happy Mother's Day!"

Alternatives:
  • Since I don't need many Mother's Day cards, I also use these for birthdays changing the inside to "...to wish you a Happy Birthday!"
  • They could also be used to say Congratulations ("...to congratulate you" or "...to wish you well") or Thank You ("...from your generosity").
Additional Photos: