Inspiration: I was browsing images of kawaii pandas and came across this
really cute sticker image I liked. I thought it would make a cute ornament so I bookmarked it and then came back to it when I had some time this past week.
How I Made it: I'm actually going to take you through this step by step (trying something different).
Step 1: After playing with the size of the image a little, I printed out 2 copies of it so I could cut them up and use them to help me make templates on cardstock (something a little thicker than my usual printer paper).
Step 2: After cutting out the templates, I cut out all the felt pieces I thought I'd need using them. Tip 1: Put a small tape roll on the back of the template to secure it to the felt as you cut. Tip 2: For parts that will "stick out" of the piece, use stiff felt if you have it (I did for the ears but didn't have any for the teacup handle or bottom).
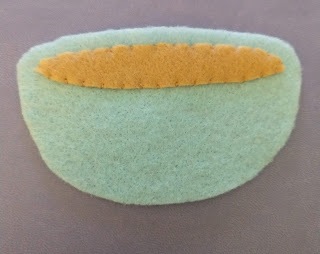
Step 3: Using an embroidery floss to match the color of felt used for the teacup fill, applique the teacup fill to one of the teacups. I used DMC 3773 with my tan floss.
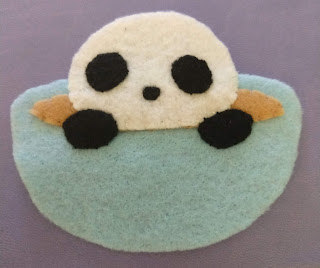
Step 4: Using white embroidery floss, applique stitch one panda head to the teacup. It will overlap the teacup fill lining up directly to the bottom edge of it.
Step 5: Using black embroidery floss, applique stitch the panda hands to the teacup. They will overlap both the panda head and the teacup fill at various points.
Step 6: Using black embroidery floss, applique stitch the panda eyes and nose on the panda head. Again going through all the layers. As an alternative if you find the panda nose to be too small, you could embroider it using a satin stitch.
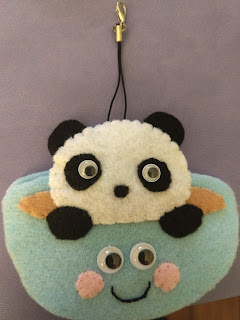
Step 7: This is when I glued on my goggly eyes. I used E6000 adhesive this time but sometimes I use Aleene's Tacky Glue for these. Both work well. If you don't want to use googly eyes, you could stitch a white french knot (using all 6 strands of the thread) for the panda eyes and then use a single couched stitch in black for the closed eyes on the teacup.
Step 8: I cut larger cheeks than the original image. Using embroidery floss to match the light pink felt (DMC 761), applique stitch the cheeks on the teacup.
Step 9: Using black embroidery floss, backstitch the smile on the teacup.
Step 10: Lay the top finished piece face down on the table, Layer on the 2nd panda head so the edges line up. Lay on the 2nd teacup so it's edges line up. Then pin just the 2nd panda head and 2nd teacup together. Finally using embroidery floss to match the teacup (DMC 3761 for the light blue teacup and DMC 209 for the light purple one), applique stitch just the edge that meets the panda head to assemble the back of the ornament.
Step 11: Place together the front and back of the ornament (finished sides facing out). Position the ears in between the heads and a ribbon or charm holder at the top of the head (again between the heads). Using white embroider floss, blanket stitch the heads together. Get really close to where the teacup is so you don't have a gap when finished.
Step 12: Using embroider floss to match the teacup (see Step 10), blanket stitch together the teacups starting on the right side of the ornament. Place the teacup handle in the correct place after you make your first 2 stitches. If you want to include the teacup bottom, place it in the correct location about 2 stitches after you finish securing the teacup handle. I gave up on the bottom because I didn't have stiff felt for it. It's a cute ornament either way. Pause before finishing the left side to stuff the ornament with polyfill (keep it light and don't overstuff). Then finish the stitching.


